Tampilkan postingan dengan label MTS. Tampilkan semua postingan

Rabu, 31 Juli 2013

Flawlessly Convert Sony HX200V 60p MTS files for using in FCP, iMovie, QuickTime Player


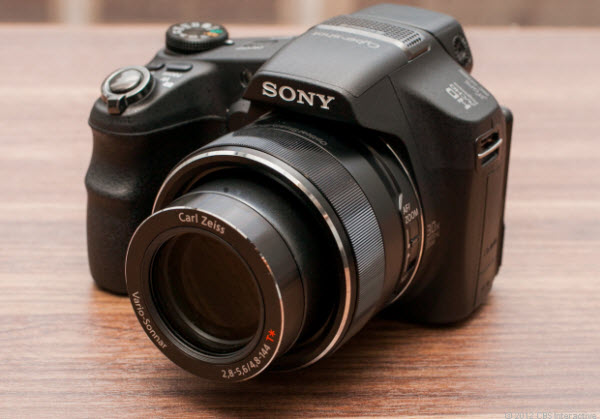
Sony Cyber-shot DSC-HX200V is a fast-shooting megazoom with excellent photo and video quality for its class, and plenty of shooting options to make casual and advanced shooters happy. Recently, I take some pictures with it of birds, try to capture flight and movement and want to select individual frames. I'm satisfied with the full HD Movie Shooting capability (1920×1080/60p) and Optical SteadyShot Active Mode.
However, My HX200V camera gave me videos as AVCHD file which I have not acknowledged with. I tried with both FCP, iMovie and quicktime, but none of them could recognize it. Is there any step-by-step work flow for this? Which software can convert video taken with my Sony HX200V Cybershot camera for working with my mac? PS: the footages are on 1080 60p. 

In this case, I googled to search the solutions. I find this 60p MTS and M2TS video format is not friendly for use on Mac, Mac platform best supported format is .mov format. So I tried to seek for the best avchd converter for mac to do convertering. Now I get this MTS/M2TS Converter for Mac from Pavtube.

I have successfully convert Sony HX200V 60p AVCHD to best codec for editing on Mac. This software is top MTS converter for Mac that can transcode AVCHD files to Apple InterMediate Codec (AIC), Apple ProRes 422 codec, QuickTime codec, etc. These output formats are specially presetted, so the conversion quality is guaranteed, I can get lossless video conversion with this tool. 

Here I will share the easy steps that you can follow to transcode Sony Cyber-shot DSC-HX200V 60p AVCHD MTS to MOV for using in FCP, iMovie and QuickTime Player. 

1. Install and run the best Sony 60p MTS Converter for Mac, it's an professional AVCHD to FCP/iMovie/QuickTime Converter which can convert Sony DSC-HX200V 60p AVCHD files to different formats on Mac (including OS X Mavericks 10.9).  
Click "Add Video" to load the 60p .mts files from Sony HX200V Camcorder to the Mac Converter. 
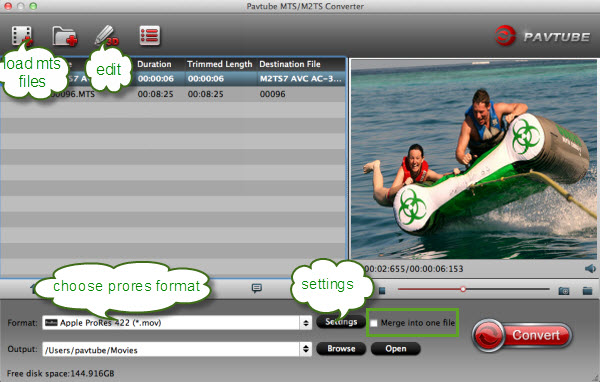


2. Click "format" bar to choose output format:

Choose "Final Cut Pro -> Apple ProRes 422 (*.mov)" as the best output codec for importing 60p MTS files to Final Cut Pro (X) editing.
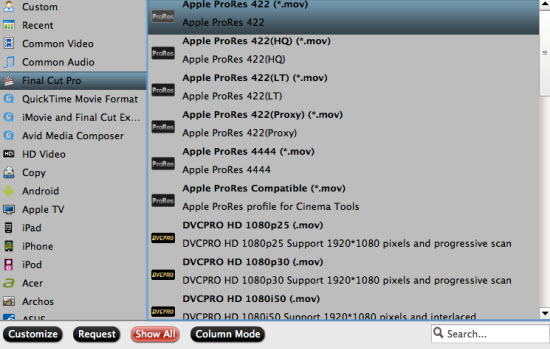
 

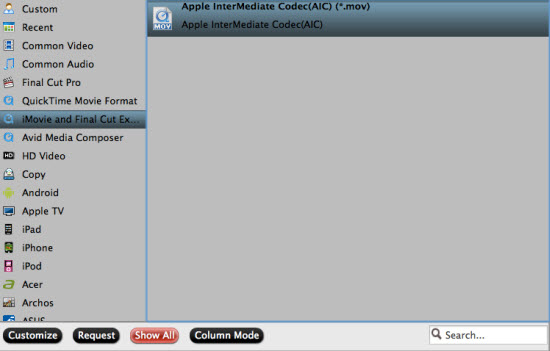
Choose "iMovie and Final Cut Express > Apple Intermediate Codec(AIC) (*.mov)" as the best video format for editing 60p AVCHD files to iMovie


Choose "Common video -> MOV-QuickTime (*.mov)" to play Sony 60p AVCHD mts with QuickTime Player.


Step 4. You can click “settings” to customize the output parameters, adjust the resolution, bitrate as you want. 

Tips:

If you would like to add Anaglyphic 3D effect or Subtitle for your footage, click "Edit" icon to start video editing with your 3D files, such as adding Anaglyphic 3D effect(Red-Blue, Red-Green) as well as adding watermark, trim your videos and so on.

You can also click "Subtitles" option, add srt, ass, ssa suntitle you want.


Step 5. Click convert button to start converting Sony HX200V 60p AVCHD MTS to Prores/AIC/QuickTime mov for FCP, iMovie editing and QuickTime Playere playback.

After the Mac MTS to MOV conversion, you can import the converted footages to FCP, iMovie  and QuickTime Player for editing and playing smoothly on Mac.

Learn more:
How to edit Sony Cyber-shot DSC-HX200V in iMovie
Sony HX30V to FCP X, iMovie, FCE 4, Avid, Premiere

Senin, 29 Juli 2013

Down-convert Panasonic GH2 MTS footage from 1080p to 720p for editing in FCP/Premiere

Summary: In this article, you can learn the best way to convert Panasoni GH2 AVCHD MTS to a file that FCP/Premiere can recognize on Mac(Mavericks 10.8 included) with downsizing 1080p HD video to 720p.


Panasonic Lumix DMC-GH2 

Panasonic Lumix DMC-GH2 updates the highly acclaimed if rather pricey GH1 Micro Four Thirds system camera. As such the GH2's styling is closer to that of a baby DSLR than its sibling's, the GF2 compact camera form. While stylistically similar, its size is roughly a third of the size of Olympus' Four Thirds E-5 DSLR, and closer in fact to that of a bridge camera. Except unlike a bridge camera, the Panasonic's added appeal is the ability to swap the lens in use. Therefore it's fair to say that for those who like the feel of a DSLR but not the attendant bulk, the GH2 is potentially a very attractive proposition. It's in effect a DSLR 'lite'. 

Easiest way to convert GH2 1080p .mts to 720p?

I'm a Director, DP-Editor/Gaffer. I do commercials and corporate work. I got my Panasonic GH2 and I shot all the .mts footage myself about Teaching Practices in Public Schools in Maryland. I like One-touch HD video recording and manual controls. And now I need to down-convert GH2 MTS footage from 1080p to 720p for storage and editing in FCP&Premiere. Is there any easy way (free or nominal fee)? 

Why we need to downsize the HD video?

By google search, you can see many folks are asking about how to downsize 1080p to 720p. It is my impression that if I edit with actual 720p files, it will be less strain on the system both in editing and rendering as well has hard drive space. In fact, it really does. After reducing the big video size, we will edit more smoothly, save space and make 1080p video playable on protable device like iPad.

An easy to use 1080p to 720p Converter

As in the above case, you have the need to find a professional MTS Converter for FCP/Premiere to downsize 1080p HD video to 720p. Pavtube MTS Converter for Mac is exactly the one ease of use. I have used it on my project, it is helpful in down-converting Panasonic GH2 1080p full HD video to 720p video quickly and transoding GH2 MTS file to FCP/Premiere editable Prores codec, then I can wok well with GH2 mts file in FCP and Premiere. Overall first impression is excellent. Below I will share the step-to-step guide to you.

Simple way to downconvert GH2 1080p to 720p for editing in FCP/Premiere

Step 1. Download Pavtube MTS Converter for Mac. This professional Panasonic MTS Converter can help you convert 1080p AVCHD MTS files to rich formats for use on Mac(Mavericks 10.9 included). 

Step 2. Install and launch this 1080p to 720p MTS Converter. Import 1080p MTS footage from GH2 to it. 


Step 3. Click "Format" bar to choose format for output, you can choose 
Final Cut Pro > Apple ProRes 422 HQ (*.mov) for editing in FCP and Premiere Pro.


Step 4. You can click “settings” to customize the output parameters, adjust the resolution, bitrate as you want. To down-convert 1080p to 720p, you just need set Size(pix) to 1280*720. That is the exact 720P.


Step 5. Click convert button to start converting Panasonic GH2 1080p AVCHD MTS to Prores for FCP and Premiere editing with 1280*720 definition.

As long as the conversion is done, you will get the 720p mov video files in full screen from its destination folder, and then you can import the files with 720p resolution to FCP/Premiere editing
 smoothly on Mac (including Mavericks 10.9).

Read more guides here: 

Panasonic G3 AVCHD to FCP
Panasonic DMC-FZ200 MTS to iMovie
Make Panasonic LX7 compatible with Avid MC
Panasonic Lumix GH3 MTS in FCP X
Edit Panasonic HC-V720K 1080 60p/50p MTS in FCP X
Panasonic HS900 AVCHD work with iMovie/FCE
Work with Panasonic V700 1080/50p AVCHD  in FCP

Senin, 15 Juli 2013

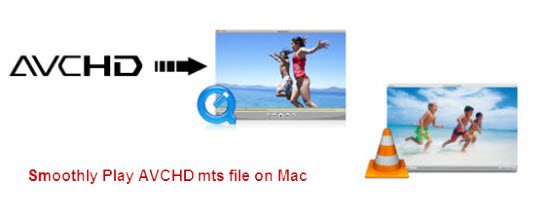
Smoothly playing AVCHD MTS files on Mac without slow motion problem

Summary: Follow the guide you can easily convert AVCHD mts files to QuickTime MOV for smoothly play AVCHD videos on Mac with A/V syncing.           

Q: MTS playing in slow motion but sound is normal speed

Hi,
A friend took some mts video for me and gave me the SD card - I'm able to see it in several programs but it's always playing in slow motion though the sound is normal. How can I get it to play normal speed? Or covert it to normal speed? Thanks!


A: If you videos are from cameras or camcorders, it must be syncing well. So the problem may lies in the media player you choose. So at first check your computer specs, and make sure that it runs fast for work with the media player on your mac.

Then for playing mts files on mac, what is the best Mac MTS/M2TS player? You can try mplayer osx extended, or VLC to play it back. Quicktime cannot handle transport streams very well.

VLC media player is said to support AVCHD footage on Mac, and you can choose to play the files. However, there is also slow motion problem when playing .mts .m2ts files with VLC. The audio plays in normal speed, while the video time is double as what it should be. In other words, the sound is OK but the image lags behind. This might happen to computers with low configuration - CPU, video card. 

Many users do not have a powerful enough Apple computer with Intel Core i7, good graphic processors, and they may expect Apple QuickTime Player to natively support AVCHD videos, just like the WMP in Windows 7. So for smoothly playing AVCHD on Mac, they may need to convert AVCHD to QuickTime MOV on Mac.

It’s hard to find an excellent AVCHD Converter. Now, Pavtube AVCHD MTS/M2TS Converter for Mac will help you convert AVCHD files to MOV for QuickTime with keeping the best quality of the original video to the output file. It's also a good software which can convert AVCHD videos to any common formats. You can follow the tips below to convert AVCHD video to QuickTime MOV format.

1. Download Pavtube MTS to QuickTime Converter, install and run, and then import the AVCHD files you want to convert.


2. Click Format bar and choose best output format for output. Click and choose common video -> MOV-QuickTime (*.mov). You can also choose other formats for output as you want.


3. You can click “settings” to adjust the output parameters, such as resolution and bitrate.

4. Edit function is very easy to use, you can trim, crop, add watermark or adjust effect before converting AVCHD videos to QuickTime MOV on Mac.

5. Click convert button to start converting AVCHD to QuickTime MOV file on Mac.

After conversion, you can use converted .mov files as you want. Now smoothly playing AVCHD file on Mac is without any problem.

Read more:

Convert AJ-HPX2700 P2 MXF to QuickTime MOV
Work with Canon XF305 MXF to play on QuickTime
Play XAVC with QuickTime
Transfer Sony XDCAM to QuickTime Player

Kamis, 11 Juli 2013

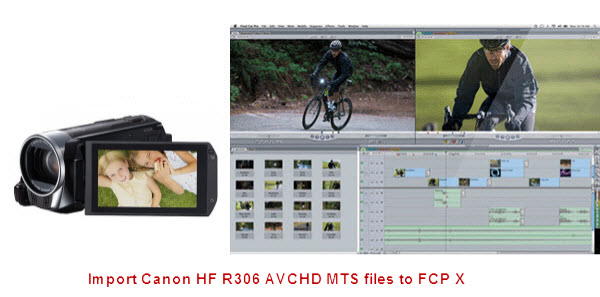
Tricks for importing Canon Legria HF M306 AVCHD MTS files to FCP X


Summary: If you are facing the issue when importing and editing Canon Legria HF M306 AVCHD footage in Final Cut Pro X, here recommend you the best Mac Canon MTS to ProRes Converter to achieve your goal smoothly.

Canon Legria HF R306 camera, as an update of entry-level Legria camcorder range at CES 2012, is a Full HD compact camcorder, featured with a 1/4.85in CMOS sensor, 32x optical zoom, 51x intelligent zoom, a 3in colour touchscreen monitor and a whopping 8GB of internal storage space. That specification is already pretty good for a camcorder of this price, but Canon has gone even further by adding Wi-Fi connectivity, which means you can transfer recorded videos to your PC without a USB cable and stream videos to DLNA-enabled TVs and games consoles. All of this is recorded straight to memory card so you can quickly and easily share your movies with friends and family.

I have just got a Canon Legria HF M306 camera and I have taken it on my trip. After recording some footage HF M306, I wanna share this with others. To get better effect, just now I'm trying to get the AVCHD recording from it into Final Cut Pro X, but without much success, that is, I can get the Canon to show up on my desktop, but can't seem to get FCP X on my Mountain Lion to capture the video from the M306 camera using the USB Cable. 

AVCHD is highly compressed and not ideal for editing with Final Cut Pro X you can't natively import Canon HF R306 mts in FCP X. In order to smoothly edit Canon HF R306 AVCHD files in Final Cut Pro X without crashing problem and avoid rendering, you'd better transcode the Canon AVCHD to FCP native format, say, Apple ProRes Codec with some help from a third-party software. 

Required Software:

Pavtube's AVCHD MTS/M2TS Mac - a top Canon AVCHD Converter for Mac users.

The Mac Canon MTS to FCP Converter is an easy to use yet professional AVCHD Converter on Mac OS X which can not only transcode Canon Legria HF R306 AVCHD files to Apple ProRes codec videos for Mac editing, but also provide simple video editing functions for you. Besides, the program can also convert HD videos from HD camcorders or DVs (like JVC, Panasonic, Sony and Cannon) for editing in Final Cut Pro, Final Cut Pro X, Final Cut Express, iMovie, Avid, Adobe Premiere etc.

The following passage guides you how to convert Canon Legria HF R306 AVCHD footages to Apple ProRes 422 encoded MOV file for FCP X. If you have the same problem about editing Canon HF R306 MTS videos in Final Cut Pro X, check out the brief guide below.

Step 1. Import Canon HF R306 AVCHD videos to the top MTS to FCP Converter for Mac.
 

Step 2. Click the format bar, and move mouse cursor to "Final Cut Pro > Apple ProRes 422 (*.mov)" as output format.


Step 3. Click "Convert" button to start transcoding Canon Legria HF R306 AVCHD files to Apple ProRes Codec for Final Cut Pro X under Mac OS.

Some more helpful features of the app:

1. Settings- click to set video resolution(1920×1080/1440×1080/1280×720/720×480), bitrate(from 1Mbps to 20Mbps), frame rate (24p/30p)

2. Editor (next to "Add" icon)- click to set deinterlace, denoise, mute, volume up, trim, crop, etc.

After a shot conversion, you will be able to load/transfer Canon Legria HF R306 AVCHD videos into Final Cut Pro X editing without rendering.

Tips: Before you try to do the conversion, if you are also a FCP X user, please make sure that you have installed the Apple ProRes Codec manually since the FCP X asks users to install it by themselves.


Realted Canon AVCHD articles:

Canon HF M500 AVCHD workflow on FCP, FCE, iMovie
How to import Canon Vixia MTS to Windows Movie Maker?
Work with Canon Legria HF20/HF200 MTS Videos on Mac
Transcode Canon C100 AVCHD on Mac
Deinterlace Canon VIXIA HF G20 AVCHD to iMovie/FCE
Transcode Canon Legria AVCHD footage on Mac

Rabu, 10 Juli 2013

Panasonic GH3 and G5 firmware update brings low light AF, silent shooting

If you've been spooking subjects or failing to focus on them with your Panasonic Lumix GH3 or G5, you might feel like you got a brand new camera today thanks to a firmware update. Its new features include low-light (-3EV) autofocus and a "silent mode" setting that'll turn off the electronic shutter, all sounds and the flash emission in one go, leaving subjects like deer or golfers undisturbed. You'll also get an exposure compensation shutoff reset option, better AF performance with certain lenses and a WiFi fix for Mac computers. You can grab it at the source, proving it's not only hackers that bring free goodies to pricey cameras.


Version 1.2 for the GH3 adds the 'Low light AF' previously seen on the G6 that works down to -3 EV, a 'silent mode' that turns off operational sounds and flash firing, and an 'Exposure Compensation Reset' function'. Meanwhile version 1.1 for the G5 only corrects wording of the Motion Picture menu on cameras sold in PAL broadcast regions (including Europe and Australasia), and therefore isn't required by US owners. Click below for full details and to download the firmware.

Click here to download the latest firmware for the Panasonic Lumix DMC-GH3 (Ver 1.2)

Click here to download the latest firmware for the Panasonic Lumix DMC-G5 (Ver 1.1)


Related gudie:

Panasonic G3 AVCHD to FCP
Panasonic DMC-FZ200 MTS to iMovie
Make Panasonic LX7 compatible with Avid MC
Panasonic G6 Review and Mac editing Workflow
Panasonic HC-V720K AVCHD to FCP X
Panasonic HS900 AVCHD work with iMovie/FCE